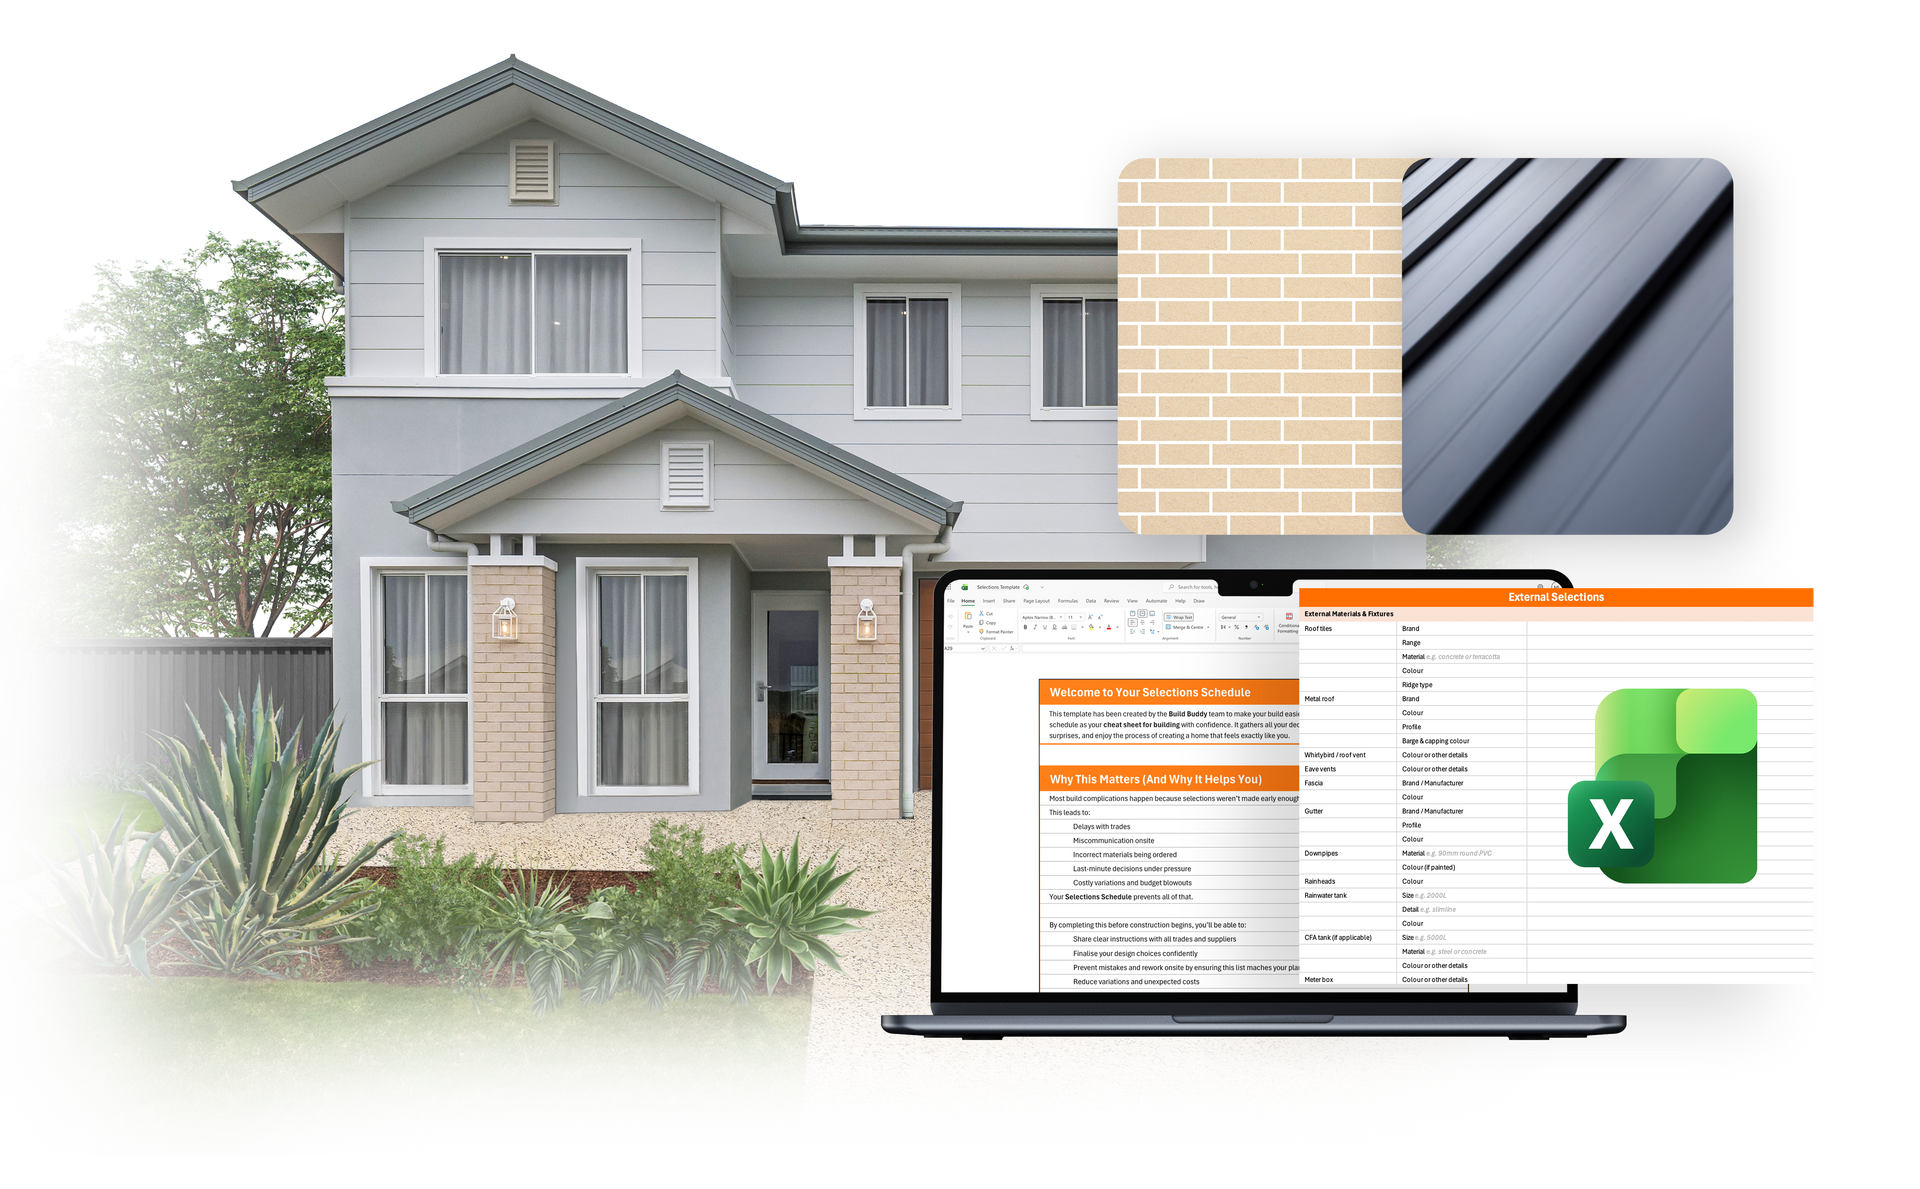
What Is the External Selections Schedule?
The External Selections Schedule is the formal, build-ready summary of all your external materials and finishes — including roofing, walls, windows, doors, driveway, and other exterior features. It captures all relevant details (products, colours, suppliers, installation notes) and is shared with your trades to guide quoting, approvals, and construction.
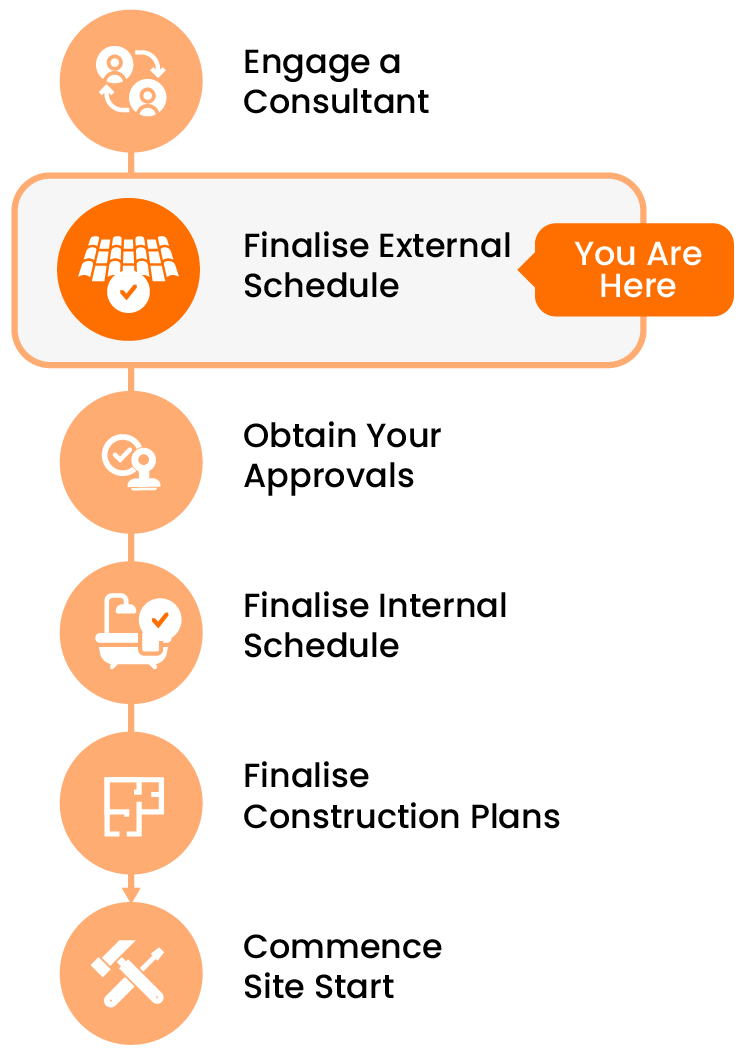
This task is about
managing and finalising that schedule in collaboration with your Selections Consultant, ensuring it’s complete, accurate, and aligned with your vision and ready for approvals.
What Does Finalising the Schedule Involve?
Finalising your External Selections Schedule typically includes:
- Reviewing the schedule draft prepared by your Selections Consultant
- Providing missing product details, images, or supplier information
- Clarifying installation notes or special finishes
- Responding to Requests for Information (RFIs)
- Tracking any agreed milestone payments (if using a paid consultant)
Once finalised, this document becomes the reference point for:
- Your approvals, such as your council or certifier
- Your building designer to reflect your selections accurately on your plans
- Future suppliers or trades when requiring information additional to your plans

Tip: Working With Your Consultant
You’ll need to maintain open communication with your consultant throughout this stage. Specifically:
- Reply promptly to any RFIs or clarification requests
- Confirm when changes are made or decisions are final
- Ensure any payment milestones (if applicable) are managed on time
If you’re unsure how to provide information, ask — your consultant can guide what they need and how best to format it.
What Makes a Good Final Selections Schedule?
- All selections are clearly listed with accurate names, colours, and specifications
- Any custom products include brand, supplier, finish, and notes
- All RFIs have been addressed, and there are minimal placeholders or "TBC" entries
- The schedule is easy to follow and ready to be used by your trades
- You’ve confirmed sign-off with your consultant
A strong schedule is about more than looks — it’s about clarity, coordination, and confidence that your build is ready to move forward.
Frequently Asked Questions
What if I find an error after the schedule is finalised?
If ordering hasn’t begun, changes may still be possible — but aim to catch issues before final sign-off. If you change your mind later, it does open you up to the risk of fit-out or fit-off issues later during construction. It is highly recommended to complete your selections before going to site.
NEED HELP?
Reach Out to Your Build Buddy Pro
If you have any questions or need a hand, your Build Buddy Pro is your best first contact. They’re a licensed expert in their field and can understand the ins and outs of your project. You can message them via the platform, or you can call them directly.
If you have already contacted your Build Buddy Pro and still need further assistance, the Build Buddy Expert Guidance and Support team are here to help. They will be able to guide you on your next steps or help you find answers to any questions you may have.