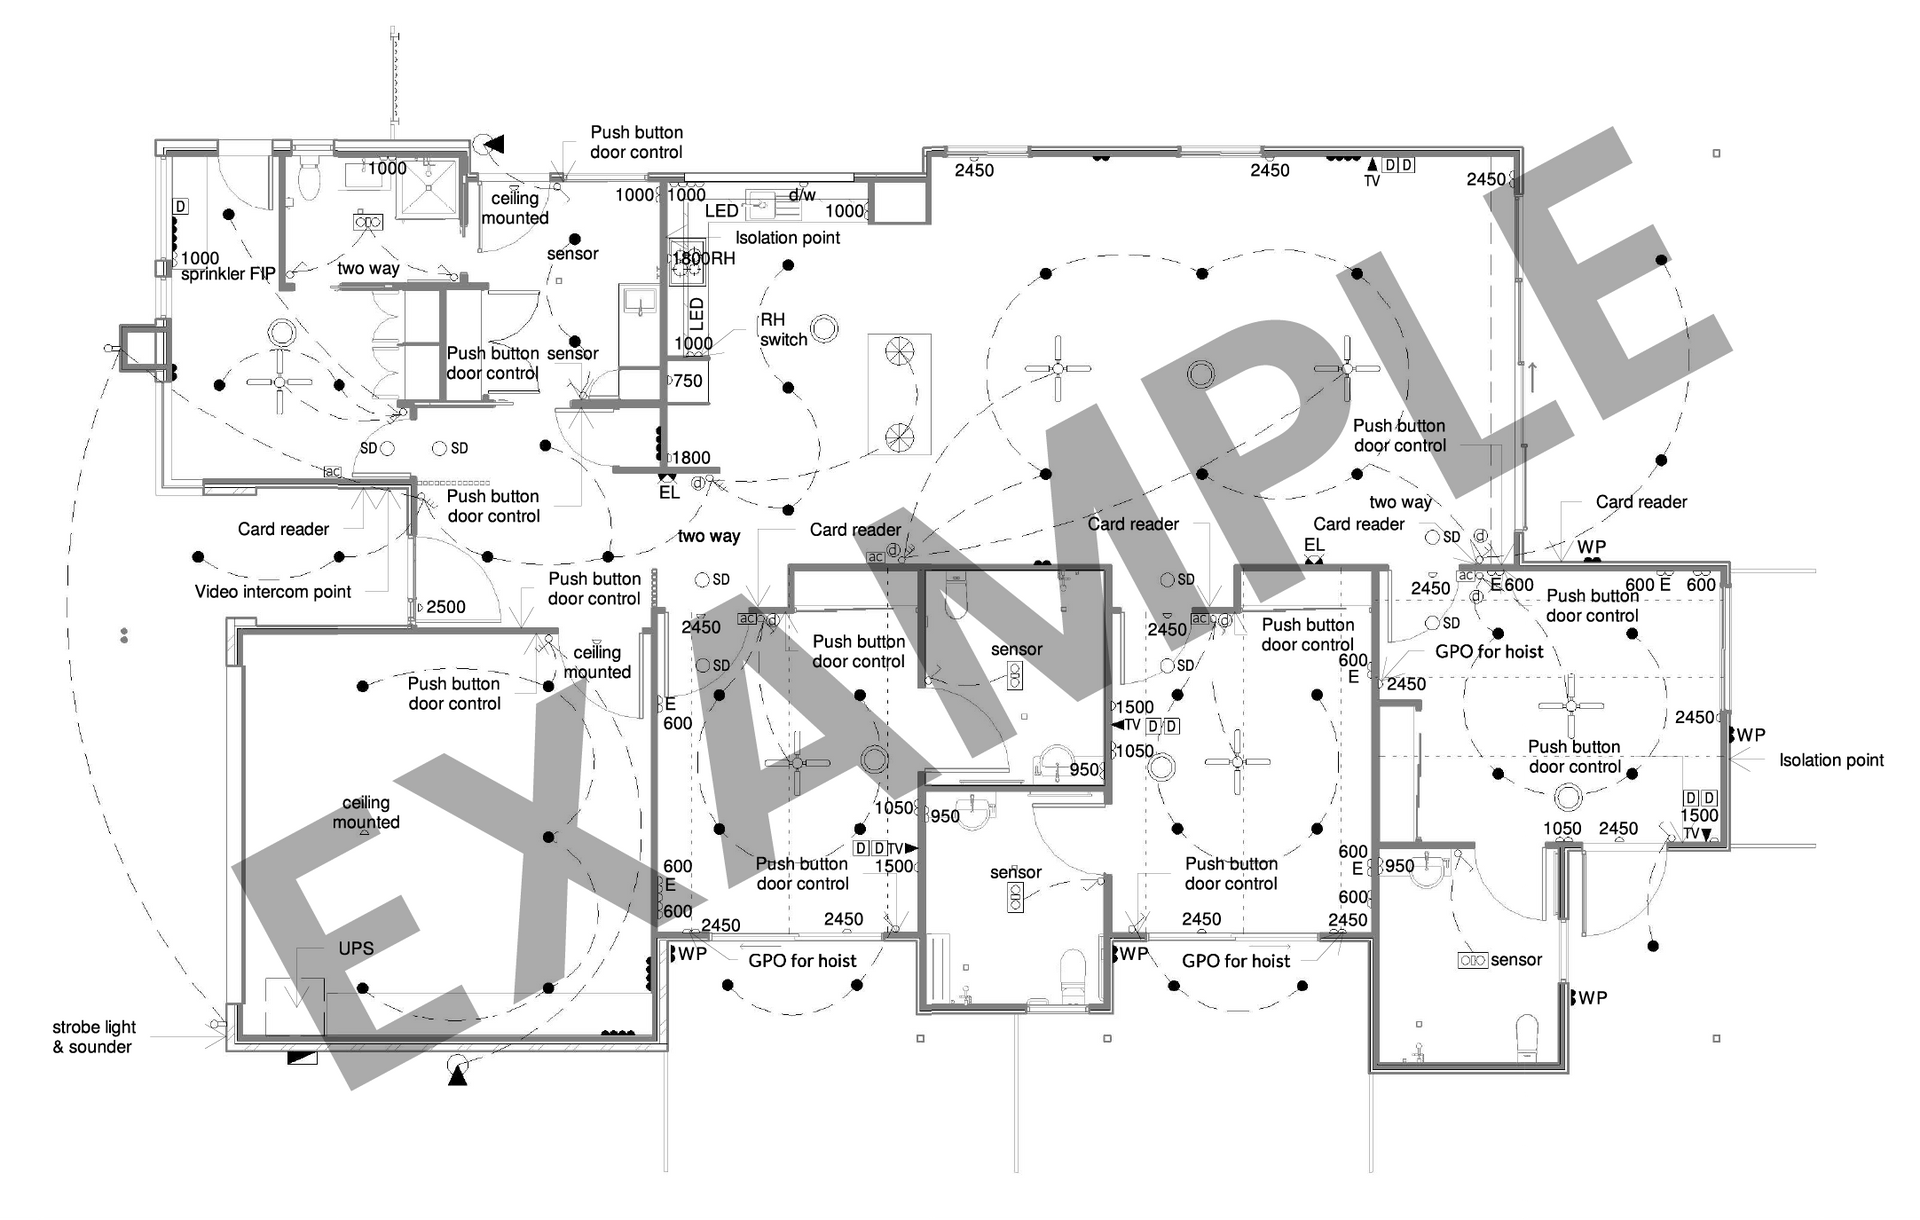
Finalising Your Electrical Plan
Ensure your electrical plan is:

Completed accurately
Reflects your vision and allows for any future upgrades
Will align with your construction drawings, and
Has sufficient detail for your future electrician to price and install.
Optional:
You can also choose to do an electrical schedule with your selected consultant (itemised list of products). If this work wasn't previously agreed, it may be at an additional cost. You can do this later if you wish, closer to the time of purchase - some electricians will even want to offer you their own product ranges to ensure quality and correct installation methods.
Your Role as the Owner-Builder
Even with a consultant engaged, you are still the decision-maker. Make sure you:
- Review each room practically (where will furniture go? appliances?)
- Confirm switching logic (two-way switches, dimmers, etc.)
- Check compliance notes
- Confirm future allowances (EV, solar, smart wiring)
- Ensure the final drawing matches your construction plans
If something looks unclear on paper, it will be worse on-site during construction.

SUGGESTION: Don't get stuck choosing exact light fittings yet
At this stage, you don’t need to lock in the exact brand or model number of every light fitting - you can if you wish to detail your electrical schedule now. Some people find it efficient to do this with their Electrical Consultant while doing their electrical plan, but you don't HAVE to.
Instead, focus on:
- The type of fitting (e.g. recessed downlight, pendant, wall light)
- The location
- The switching arrangement
You
can
finalise specific products later in the process.
ADVICE: Think ahead to future upgrades
Remember to think practically: include power points in wardrobes, under vanities, and in hallways for robot vacuums!
Also be mindful of future works or upgrades. You may want to allow capacity for smart home features, EV charging, future outdoor lighting, future pendant lights or a home theatre. It’s far cheaper to run wiring now than to open up walls later. A little forward planning here can save you significant time and money down the line.
Common example:
Don't make the mistake of not being able to get the chandelier you want because you don't have a structural beam installed in at frame stage.
Frequently Asked Questions
Is the consultant responsible for compliance?
Your selected consultant will generally design in accordance with relevant standards and best practice.
However, your licensed electrician remains responsible for ensuring the final installation complies with Australian Standards and local regulations.
Do I need to approve every revision?
Yes. Even small layout changes can affect cost and installation. Always review and formally approve revisions so it is locked-in accurately before it will be issued to trades.
What if I change my mind later?
Changes after construction begins usually trigger variation costs. It’s far cheaper to adjust the plan now.
If you want your Electrical Consultant to make changes to this plan in the future, it may incur additional variation charges.
When should I issue the final plan to my electrician?
When you are initially seeking quotes from them (typically at site start and base construction stage). Completing your electrical plan should be done well before you even start looking for Electricians.
Note: your Build Buddy workflow will raise a task for procuring your Electrician at the right time.
NEED HELP?
Reach Out to Your Build Buddy Pro
If you have any questions or need a hand, your Build Buddy Pro is your best first contact. They’re a licensed expert in their field and can understand the ins and outs of your project. You can message them via the platform, or you can call them directly.
If you have already contacted your Build Buddy Pro and still need further assistance, the Build Buddy Expert Guidance and Support team are here to help. They will be able to guide you on your next steps or help you find answers to any questions you may have.