What is an Acrylic Renderer?
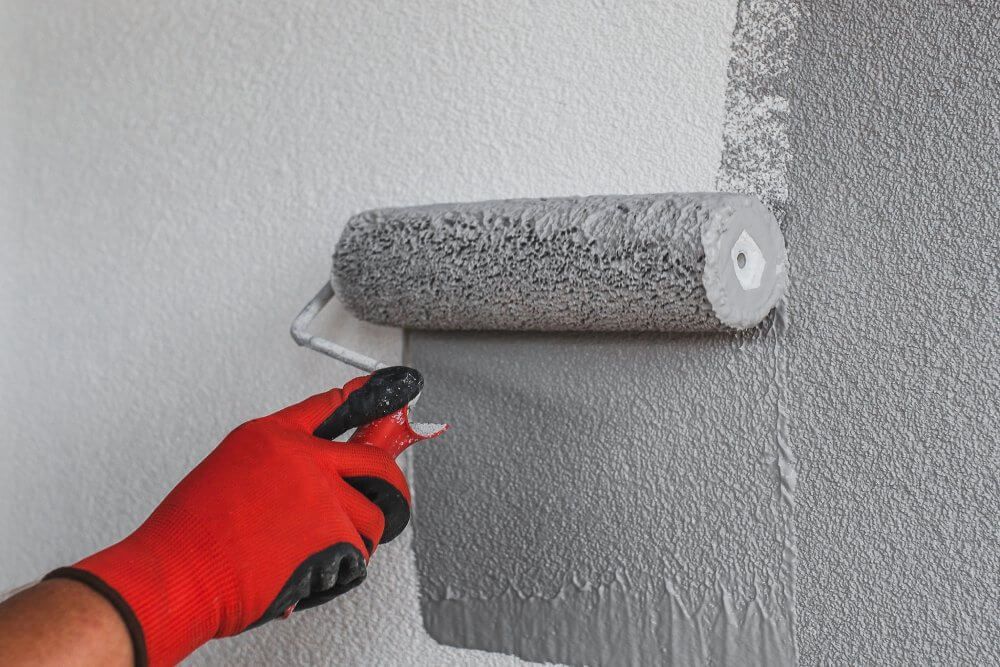
An Acrylic Renderer is a specialist tradesperson who applies acrylic-based render coatings to external walls, providing a textured or smooth finish. Acrylic renders are flexible, durable, and crack-resistant compared to traditional cement render — making them a popular choice for residential homes.
In residential builds, rendering is typically done after brickwork and cladding, but before final external painting.
What does an Acrylic Renderer do?
Your Acrylic Renderer will complete works according to your agreed scope of works.
Typically, an Acrylic Renderer will:
- Prepare the wall surfaces by cleaning and priming brickwork, blockwork, or cladding
- Apply base coats and top coats of acrylic render (usually 2–3 layers)
- Achieve the specified texture — smooth, sponge finish, bagged, or textured
- Finish corners, reveals, and control joints neatly
- Protect adjacent areas (windows, doors, fixtures) during the application process
- Provide maintenance and care instructions
Their work forms the external face of the house and significantly impacts final appearance and durability.

Tip: Make Sure Corner Beads and Expansion Joints Are Included
Ask your renderer to include corner beads and expansion joints in their quote — missing these is one of the biggest causes of cracking later down the line.
Corner beads strengthen wall edges, while expansion joints allow for natural movement. Skipping these is a leading cause of cracks later, and fixing them can be costly. Always confirm they’re part of the job upfront.
What to look for in an Acrylic Renderer
When reviewing quotes, look for:
- Experience with acrylic systems: Different from cement rendering techniques
- Brand compatibility: Should use reputable acrylic render brands like Dulux Acratex, Rockcote, or similar
- Good prep practices: Correct priming, mesh installation (where needed), and proper jointing
- Weather strategy: Acrylic must be applied in dry conditions — ask about their wet weather policy
- Warranty and compliance
Before You Begin: What You’ll Need Ready
To get quotes from Acrylic Renderers, you’ll need:
- Finalised external wall type (brick, block, lightweight cladding)
- Total m² of wall area to be rendered
- Preferred finish style (smooth, textured, bagged, coloured render)
- Access details for scaffold or site setup
- Project timeline for rendering start date
Average Timeframe
For this task, Pros typically provide quotes within
7-10 business
days.
When Can I Expect Quotes?
Timeframes often vary based on demand and the type of Pro you're engaging (e.g. a plumber). If additional communication or clarification is needed is needed, the quoting process may take longer.
Don't be alarmed if you don't receive quotes or communication from any Build Buddy Pros straight away. Some work is more complex and the Pro may need time to comprehend your documents or scope of work. Depending on the job, there may even be some work required by the Pro before they are able to quote (e.g. a site visit might be required).
If the average timeframe indicated here has passed, and you have not received any messages or quotes, please feel free to contact the Build Buddy Expert Guidance and Support team for an update on quoting for this task.
Frequently Asked Questions
Is acrylic render painted after application?
Often yes — even coloured renders usually require a protective top coat or membrane paint to seal and finish the surface.
Can I use acrylic render over all surfaces?
Most — but lightweight panels, fibre cement sheeting, and brickwork need different prep. Your renderer should specify.
How long does acrylic rendering take?
It depends on weather and wall area, but most houses are completed in 5–10 working days (including drying between coats).
How to Complete this Task?

STEP 1
Review and Adjust the Scope of Works
Timeframes may vary based on demand and the type of Pro you're engaging (e.g., a plumber). If additional communication or clarification is needed, the quoting process may take longer.

STEP 2
Confirm Required Documents Are Uploaded
Check that the following required document(s) are uploaded for this task. These are essential to proceed:

STEP 3
Update the Quality Assurance Checklist
Go to the
Quality Assurance tab in this task and review the checklist. Edit any details to suit your project requirements. Being clear and upfront helps set expectations with the Pro. Updating the checklist before requesting quotes ensures everyone is aligned.

STEP 4
Request Quotes
Click the
orange ‘Request Quotes’ button to start the quoting process.

STEP 5
Review the Quotes
Once you receive quotes:
- Review each one carefully, including the payment schedule and any special terms
- Download attached quote documents for detailed review
- Check each Pro’s profile and read past client reviews

STEP 6
Communicate with the Pro
If needed, message or call the Pro to clarify details or negotiate terms.

STEP 7
Accept a Quote
Choose the quote that best suits your needs. Once you accept a quote, any other pending quotes will be automatically declined. An agreement will automatically be generated.

STEP 8
Complete the Tasks In Your App
New tasks will appear to guide you through this job — follow each step carefully. Make sure to use the
Quality Assurance Checklist, and refer to your
contract and
final Scope of Works whenever needed.
NEED HELP?
Reach Out to Your Build Buddy Pro
If you have any questions or need a hand, your Build Buddy Pro is your best first contact. They’re a licensed expert in their field and can understand the ins and outs of your project. You can message them via the platform, or you can call them directly.
If you have already contacted your Build Buddy Pro and still need further assistance, the Build Buddy Expert Guidance and Support team are here to help. They will be able to guide you on your next steps or help you find answers to any questions you may have.