Now that you’ve received your Build Buddy Site Signage Pack, it’s time to get it installed on site.
Installing your signs is a small but important step — it helps you stay compliant, gives trades and visitors clear information, and gives your build a clean, professional edge.

How to Install Your Signage Pack
01
Complete all blank fields on sign
Double-check that you complete all information on any blank fields. We recommend using a thick readable waterproof permanent marker, such as a black sharpie.
02
Position your signs
Choose visible locations on your temporary fencing. The site information and safety signs should ideally be placed near site entry points or where trades will be arriving.
03
Attach using zip ties
Use zip ties to securely fasten the mesh panels and safety signs to the fence. Make sure they're flat, not sagging, and won’t flap loosely in the wind. Zip ties also make it easy to relocate the panels later if you need to move the placement of your temporary fence.
04
On extremely windy or exposed sites
We have provided you with high-wind mesh, but if your site is subject to unusually strong winds, we recommend cutting a few small slashes in the middle of the mesh panels to allow extra airflow. This reduces strain on the temporary fence and helps prevent damage.

Once Installed
Once your signage is up and secure, click the
orange “Mark Complete” button to move to the next step in your construction workflow.
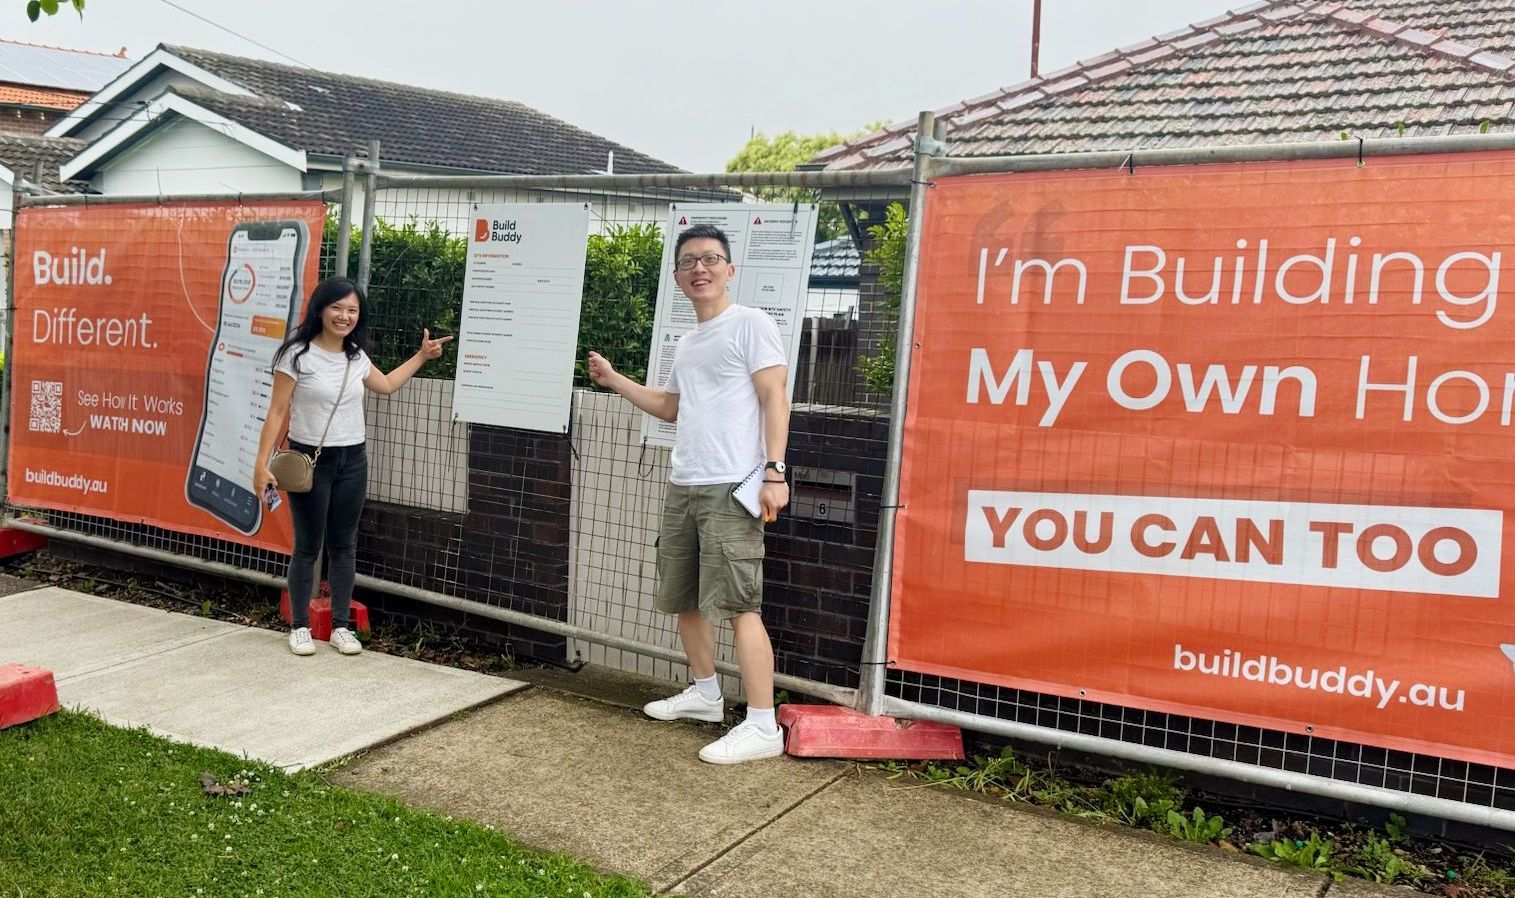
Snap a Photo — And Share the Moment!
After you’ve installed your signage, take a photo of you or your family at your site!
- It’s a great memory of when your build officially kicked off
- You can share it with friends, family, or on your socials
- Send it to Build Buddy’s marketing team — we love sharing our community’s progress and would be proud to feature your build
Just email your photos to
support@buildbuddy.au or tag any of our social accounts online.